Sending and receiving email with Pegasus Mail in Windows
Pegasus Mail is a donationware, proprietary email client that is developed and maintained by David Harris and his team.
The latest version 4.70 was released on 8 March 2014. Here we use "test@wiredblade.biz" as an example to configure this email client.
Step 1: Add an email account

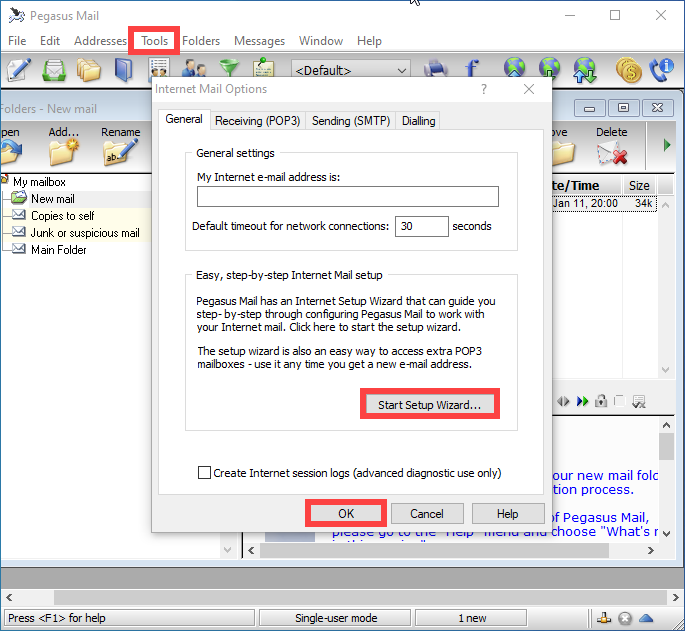
To setup an IMAP account, first launch Pegasus Mail, click
"Tools"
tab and choose
"Internet Options..". The "Internet Mail Options" window will show up. The easiest way to setup an email account is to
"Start Setup Wizard".
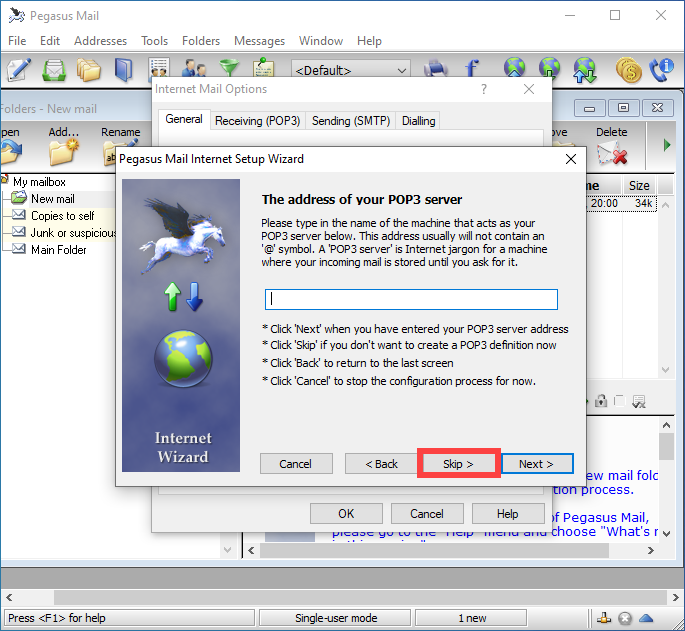
Enter your email address and click
Next
to continue.
Step 2: Setup SMTP outgoing mail server
As you continue, you will see this window asking for your POP3 server address, we are setting up an IMAP
account, so leave this box blank and click
Next.
In the window that shows up, enter your full email address as the username, and your email account's password. Click
Next
to continue.
Use
smtp.wiredblade.com
as outgoing mail server then click
Next.
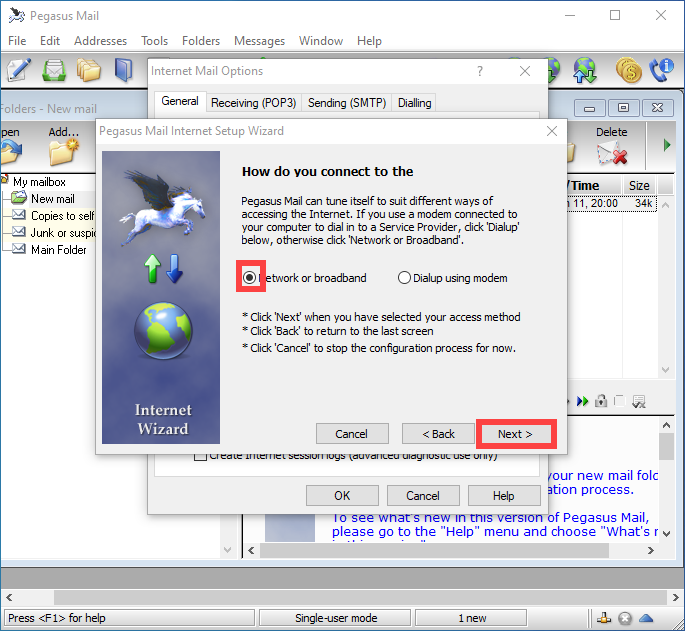
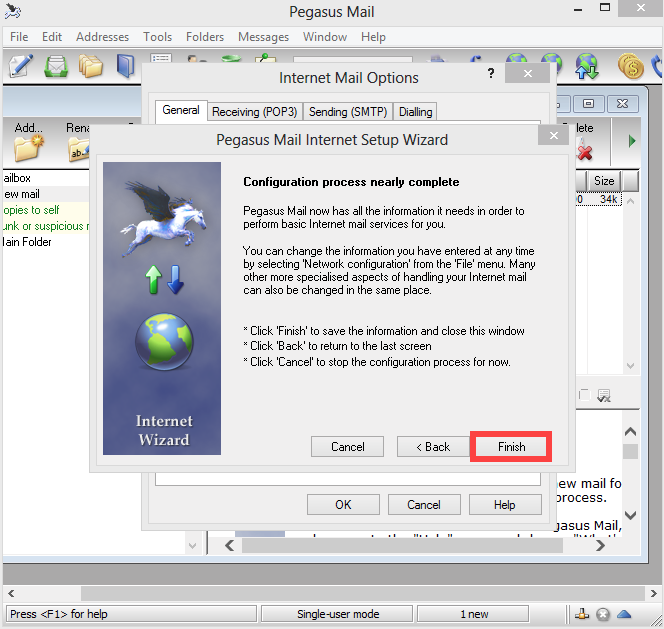
Ensure the
"Network or Broadband"
option is selected, then click
Next. Then click
Finish.
Now click
"Sending(SMTP)"
tab
to configure the outgoing mail server. Click on the SMTP server address(
smtp.wiredblade.com
) we just set up,
and click
Edit
button.
Make sure that SMTP server is
smtp.wiredblade.com
port is
465.
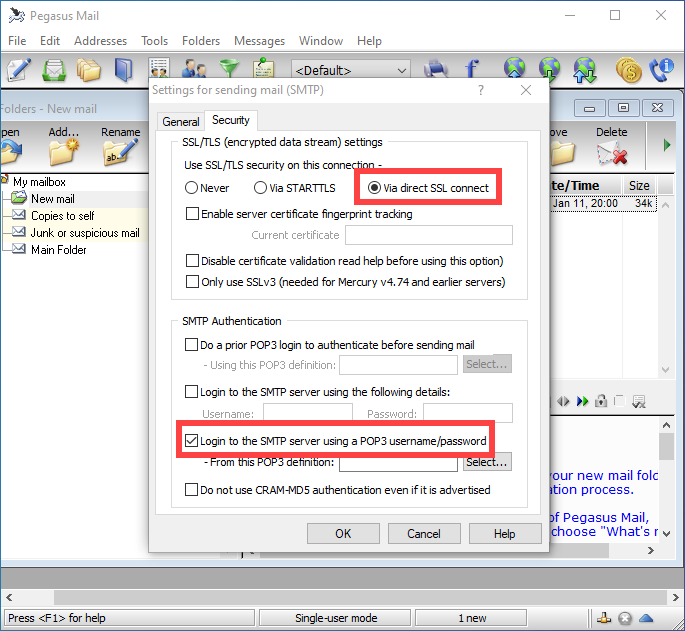
In
"Security"
tab, choose
"Via direct SSL connect"
to ensure a secure connection. Check the "Login to the SMTP server using a POP3 username/password", and click
Select
to choose a POP3 profile.
Choose the POP3 definition we just setup and click
Select. Then click
OK
twice to finish
the configuration for the outgoing mail server.
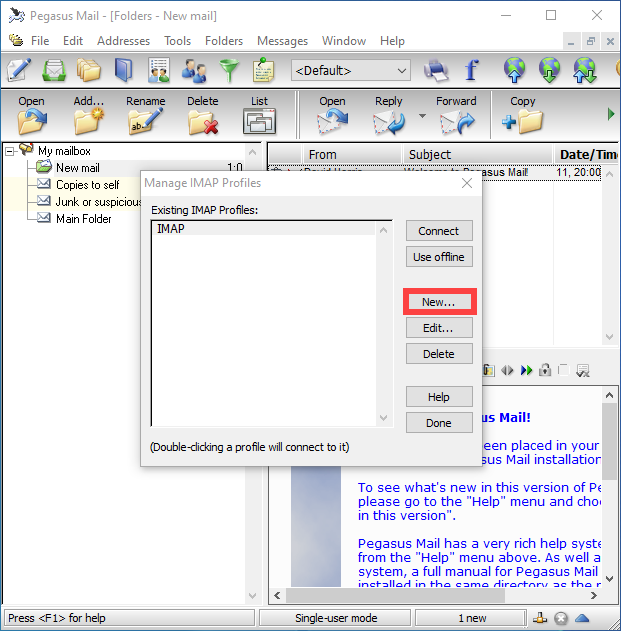
Step 3: Set up IMAP incoming mail server
To set up IMAP incoming mail server, click
"Tools"
tab and choose
"IMAP profiles..". Click
New
to add a new IMAP profile.
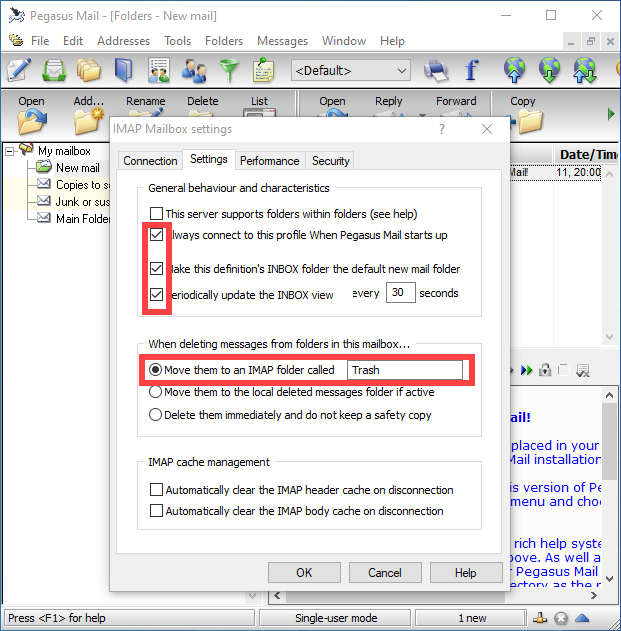
Enter a name for the IMAP connection, here we will just use "IMAP". Use
imap.wiredblade.com
as mail server. And use
IMAP SSL port 993. You need to put in user name and password one more time.
Click on
"Settings"
tab and do the configuration as shown in the picture below.
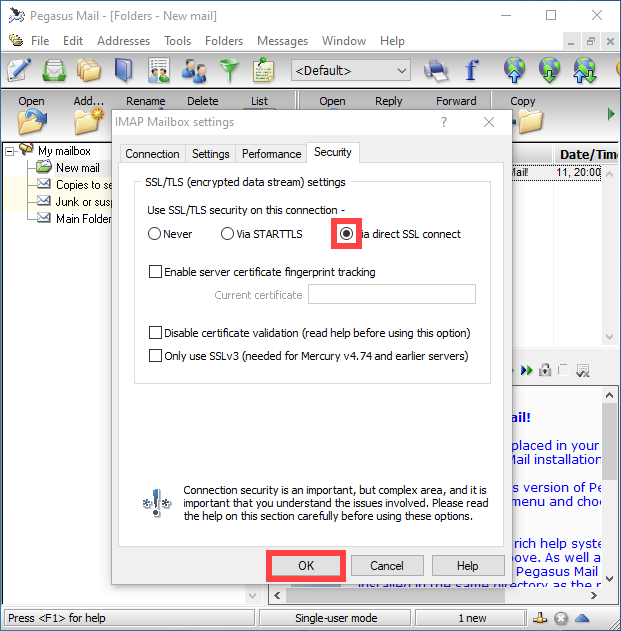
Click on
"Security"
tab choose "Via direct SSL connect". Check the IMAP settings and click
OK
to finish.
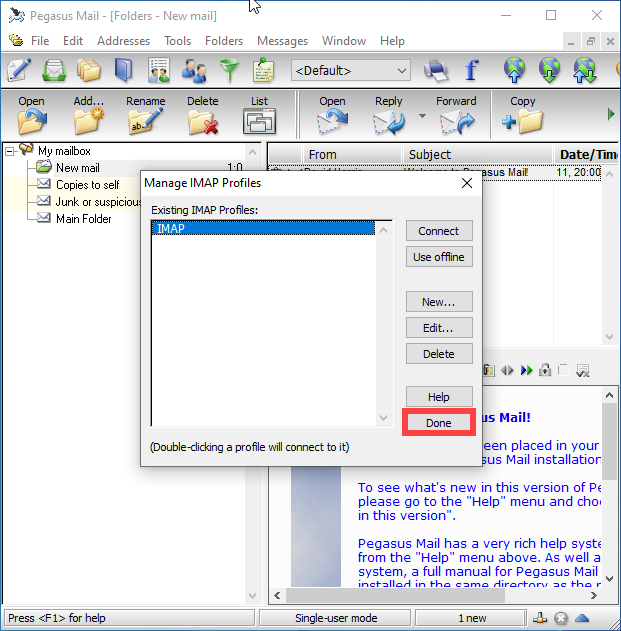
In this window, click "Done" to save all your settings.
Now you will be able to send and receive emails for the account we just set up in Pegasus Mail.
NOTE:
If you are using POP3 protocol, please change the incoming server address to
pop.wiredblade.com, and
POP SSL port 995. If you are using non SSL port, please refer
here
for port information.